- Today
- Total
| 일 | 월 | 화 | 수 | 목 | 금 | 토 |
|---|---|---|---|---|---|---|
| 1 | ||||||
| 2 | 3 | 4 | 5 | 6 | 7 | 8 |
| 9 | 10 | 11 | 12 | 13 | 14 | 15 |
| 16 | 17 | 18 | 19 | 20 | 21 | 22 |
| 23 | 24 | 25 | 26 | 27 | 28 | 29 |
| 30 |
- 시각화
- r
- barplot
- Linux
- Request
- 딥러닝
- struct
- Optional
- cocoapods
- MVC
- Observable
- ios
- HTTP
- ReLU
- 연산자
- sigmoid
- SQL
- tapply
- swiftUI
- rxswift
- scheduledTimer
- deeplearning
- decode
- 명령어
- SWIFT
- 티스토리챌린지
- substr
- rest api
- Python
- 오블완
iOS 개발 기록 블로그
iOS (Swift) URL Session for Networking 본문
오픈 API를 사용하여 데이터를 받는 것을 Networking이라고 한다.
우리의 APP은 API를 통해 Web Server에 데이터를 요청한다.
우리가 필요한 데이터를 쿼리(Query)를 통해 요청(Request)한다.
웹 서버는 이 쿼리를 해석하고 필요로 하는 데이터를 보내준다.
이를 Response라고 한다.
이러한 일련의 프로세스를 'Networking'이라고 한다.
Networking의 단계
- Create a URL
- Create a URLSession
- Give URLSession a task
- Start the task
WeatherManager.swift 파일
| struct WeatherManager { let weatherURL = "https://api.openweathermap.org/data/2.5/weather?appid={YOUR_API_KEY}&units=metric" func fetchWeather(cityName: String) { let urlString = "\(weatherURL)&q=\(cityName)" //print(urlString) performRequest(urlString: urlString) } func performRequest(urlString: String) { //1. Create a URL if let url = URL(string: urlString) { } //2. Create a URLSession //3. Give URLSession a task //4. Start the task } } |
fetchWeather 함수에서 url을 조합해서 만들어준다.
그리고 performRequest 라는 함수를 만들고 만들었던 url을 보낸다.
1단계 - Create a URL

URL 메서드 중에 위처럼 URL? 이고 문자열 하나만 파라미터로 받는 함수를 선택한다.
URL 메서드의 반환값이 Optional 이기 때문에
Optional Binding을 사용하여 위에 코드처럼 적어준다.
2단계 - Create a URLSession
| func performRequest(urlString: String) { //1. Create a URL if let url = URL(string: urlString) { //2. Create a URLSession let session = URLSession(configuration: .default) //3. Give URLSession a task //4. Start the task } } |
URLSession을 만들어준다. configuration은 default로 해준다.
3단계 - Give URLSession a task
session. 을 써주고 아래와 같은 메서드를 쓴다.

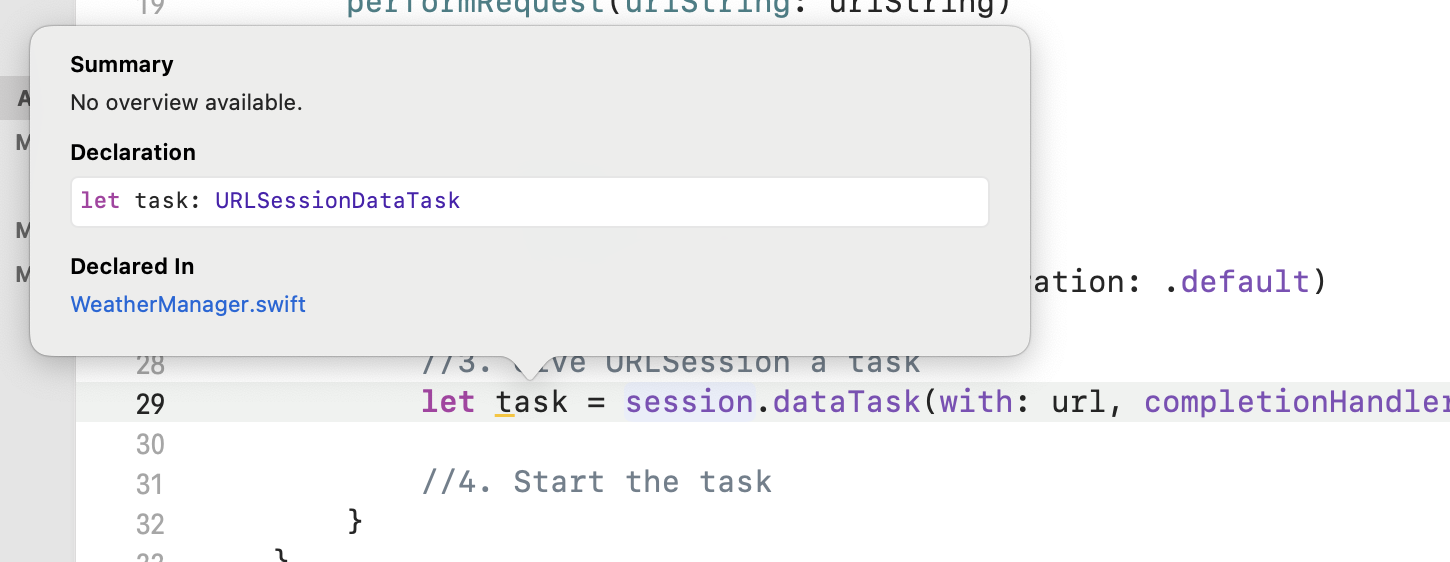
이 dataTask라는 메서드는 아래에서 볼 수 있듯이
URLSessionDataTask 라는 타입으로 값을 반환(Return)한다.

따라서 아래와 같이 task라는 변수에 해당 값을 반환시켜 받아둔다.


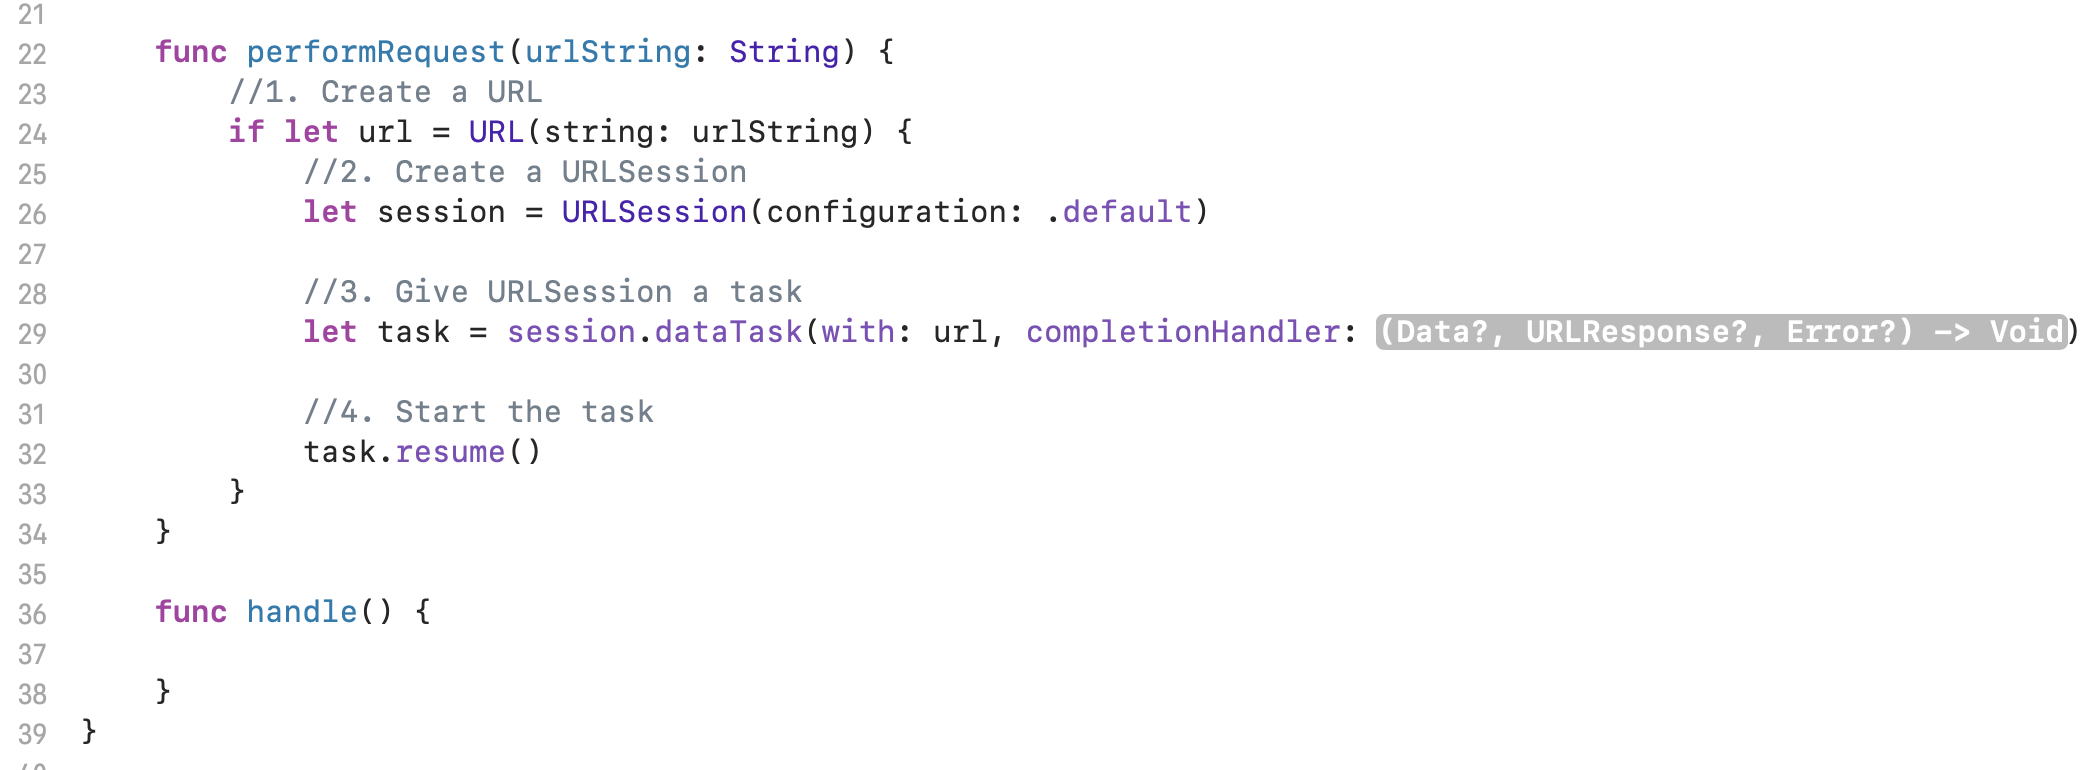
여기서 completionHandler 파라미터는 무엇일까?
URL 쿼리를 보내 데이터를 요청했을 때 인터넷 문제로 지연이 될 수 있다.
우린 completionHandler를 가지고 있다.
이는 입력 파라미터처럼 보이지만 사실 상 함수 같은 기능을 한다.
(Data?, URLResponse?, Error?) -> Void)
괄호 안에 하이푼(-)과 각진 괄호(>)로 반환 값을 가지는 것을 볼 수 있다.
비록 이 경우에는 반환값이 Void라 반환 값은 없지만 명백한 함수의 형태를 취하고 있다.
따라서 아래 쪽에 함수 하나를 만들어줘서 사용해야 한다.

만들어야 하는 함수의 형태를 보면
옵셔널 Data, 옵셔널 URLResponse, 옵셔널 Error라는 걸 알 수 있다.
그 형태에 의거하여 만들어보면 아래와 같다.
| func handle(data: Data?, response: URLResponse?, error: Error?) { } |
뒤에 -> Void 는 붙여도 되고 붙이지 않아도 된다.
그리고 completionHandler에 넣어줘보자.
| //3. Give URLSession a task let task = session.dataTask(with: url, completionHandler: handle(data:response:error:)) |
이 completionHandler는 task에 의해 트리거(발동)된다.
Networking과 Task가 완벽히 끝나고 이 Session이 끝났을 때,
바로 completionHandler를 한번 Call한다.
handle 함수에서 error를 출력해본다.
| func handle(data: Data?, response: URLResponse?, error: Error?) -> Void { if error != nil{ print(error!) return } } |
return을 해주는 건 코드가 계속 진행하지 않도록 하고
그 시점에서 멈춰 주는 역할을 한다.
그리고 에러가 없으면 아래에 계속 진행한다.
optional binding을 해주고 String 형태로 변환한다.

이때 위 이미지에 보시는 메서드를 사용해야 한다.
이게 우리가 필요한 메서드이기 때문이다.
| func handle(data: Data?, response: URLResponse?, error: Error?) -> Void { if error != nil{ print(error!) return// 에러가 있으면 스톱 } if let safeData = data { // safeData를 String 형태로 변환 let dataString = String(data: safeData, encoding: .utf8) print(dataString!) } } |
4단계 - Start the task
| func performRequest(urlString: String) { //1. Create a URL if let url = URL(string: urlString) { //2. Create a URLSession let session = URLSession(configuration: .default) //3. Give URLSession a task let task = session.dataTask(with: url, completionHandler: handle(data:response:error:)) //4. Start the task task.resume() } } |
3단계에서 만들었던 task 변수를 사용하여 resume 메서드를 쓴다.
왜 start와 같은 이름이 아닐까?
문서에 따르면 아래와 같다.
새로 초기화된 태스크는 일시 중단된 상태에서 시작되므로 이 메서드를 호출하여 태스크를 시작해야 합니다.
그래서 resume이라는 이름을 쓴 것 같다.
전체 코드
| struct WeatherManager { let weatherURL = "https://api.openweathermap.org/data/2.5/weather?appid={YOUR_API_KEY}&units=metric" func fetchWeather(cityName: String) { let urlString = "\(weatherURL)&q=\(cityName)" //print(urlString) performRequest(urlString: urlString) } func performRequest(urlString: String) { //1. Create a URL if let url = URL(string: urlString) { //2. Create a URLSession let session = URLSession(configuration: .default) //3. Give URLSession a task let task = session.dataTask(with: url, completionHandler: handle(data:response:error:)) //4. Start the task task.resume() } } func handle(data: Data?, response: URLResponse?, error: Error?) -> Void{ if error != nil{ print(error!) return // 에러가 있으면 스톱 } if let safeData = data { // safeData를 String 형태로 변환 let dataString = String(data: safeData, encoding: .utf8) print(dataString!) } } } |
실행 결과

에러 케이스

이런 에러가 나왔다면 url 주소 앞부분을 확인한다.
http:// 로 시작한다면 https:// 로 바꿔주면 정상적으로 값을 받을 수 있다.
정리
이렇게 completionHandler를 사용한다.
task 객체는 인터넷으로부터 데이터를 완전히 받았을 때
이 메서드(handle())를 Call(호출)한다.
| let task = session.dataTask(with: url, completionHandler: handle(data:response:error:)) |
위와 같은 코드를 Swift Closures 로 간결하게 줄일 수 있다.
completionHandler 이걸 Anonymous Function이라 한다.
다음 글에서는 Closure에 대해 알아볼 예정이다.
참고
안젤라유 강의: https://www.udemy.com/course/ios-13-app-development-bootcamp/
iOS & Swift - The Complete iOS App Development Bootcamp
From Beginner to iOS App Developer with Just One Course! Fully Updated with a Comprehensive Module Dedicated to SwiftUI!
www.udemy.com
'iOS' 카테고리의 다른 글
| iOS (Swift) JSON 디코딩(Decoding) (0) | 2022.06.24 |
|---|---|
| iOS (Swift) Closure 의 개념과 사용 방법 (0) | 2022.06.23 |
| iOS (Swift) OpenWeather API 모바일 앱에서 요청하기 (0) | 2022.06.21 |
| iOS (Swift) OpenWeather API 사용하는 법 (0) | 2022.06.20 |
| iOS (Swift) Delegate Design Pattern & Protocol (0) | 2022.06.16 |


