iOS (Swift) JSON 디코딩(Decoding)
| func performRequest(urlString: String) { //1. Create a URL if let url = URL(string: urlString) { //2. Create a URLSession let session = URLSession(configuration: .default) //3. Give URLSession a task let task = session.dataTask(with: url) { data, response, error in if error != nil { print(error!) return// 에러가 있으면 스톱 } if let safeData = data { // safeData를 String 형태로 변환 } } //4. Start the task task.resume() } } |
API를 통해 요청한 데이터를 받을 때
JSON 형태로 받는다.
이를 디코딩하여 우리가 다룰 수 있는 데이터로 변환해야 한다.
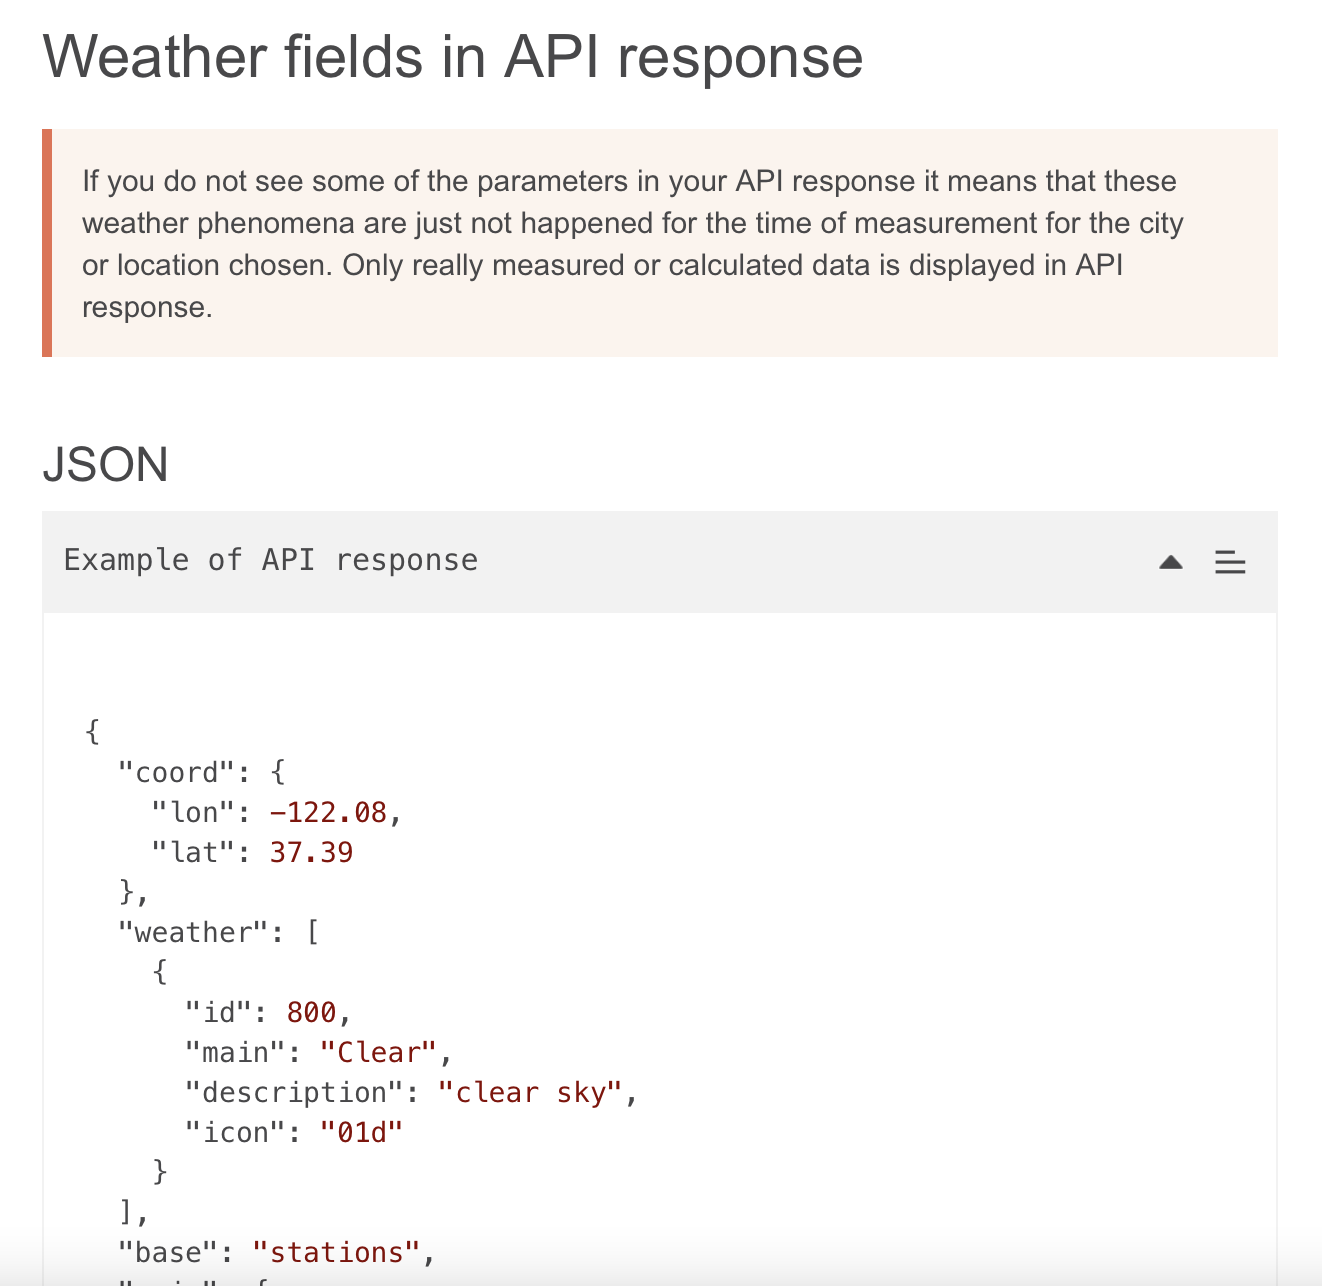
아래 API 공식 문서에 보면
API 데이터 응답을 JSON 형식의 데이터 예시를 볼 수 있다.
Current weather data - OpenWeatherMap
Access current weather data for any location on Earth including over 200,000 cities! We collect and process weather data from different sources such as global and local weather models, satellites, radars and a vast network of weather stations. Data is avai
openweathermap.org
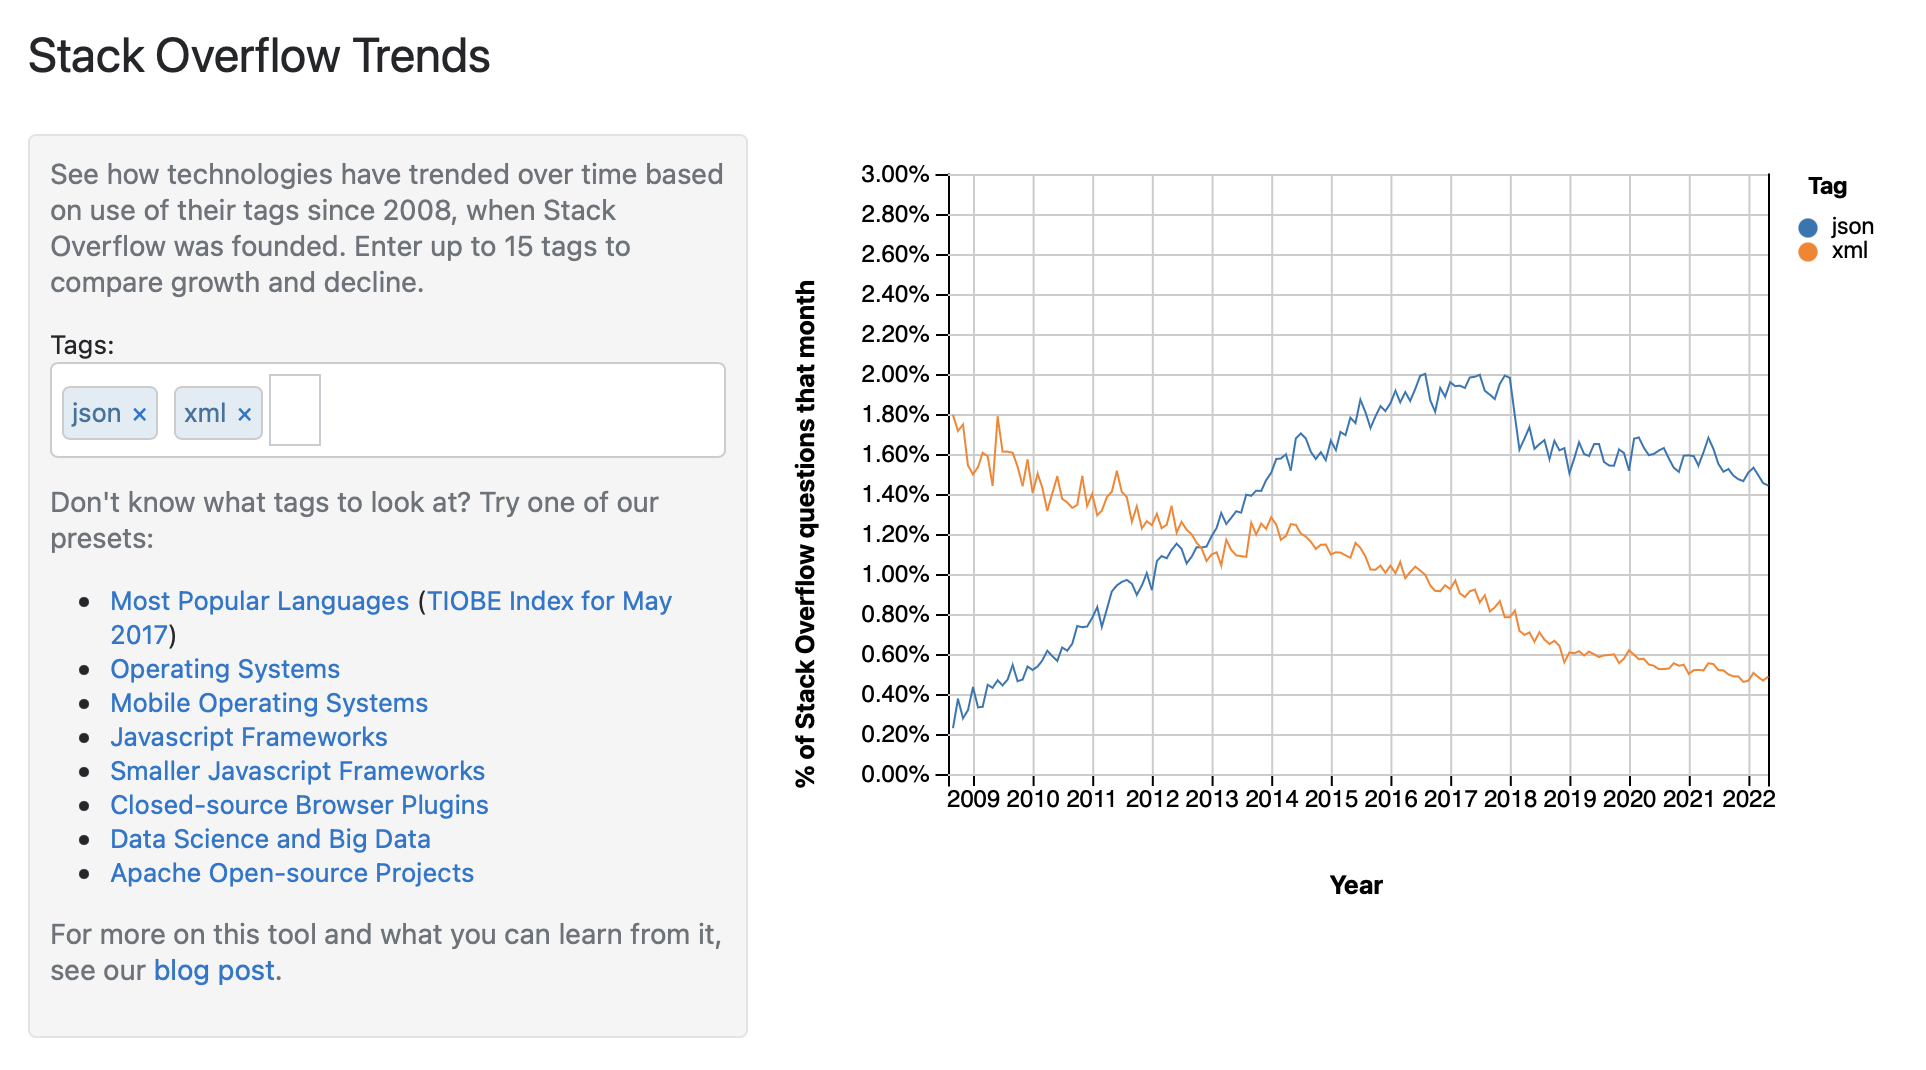
아래 이미지는 데이터 응답 포맷 중에
많이 쓰여왔던 두가지 포맷인 JSON과 XML의 트랜드를 보여준다.
Stack Overflow
Use Stack Overflow Insights and get information required to understand, reach, and attract developers.Improve tech hiring, recruiting, developer marketing, and and planning initiatives.
insights.stackoverflow.com
JSON
Javascript Object Notation
데이터를 효율적이고 가능한 한 작고 가볍게 다룰 수 있다.
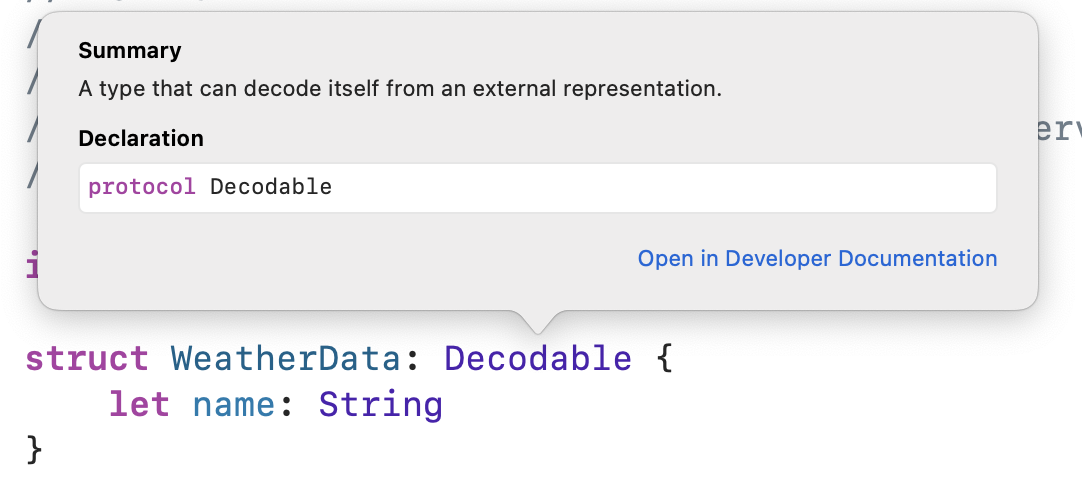
날씨 프로젝트로 돌아와서 Model 폴더에
json 데이터를 받을 WeatherData.swift 파일을 하나 만들어준다.

구조체(Structure)를 만들어주고
데이터를 받을 변수들을 만든다.
그리고 'Decodable" 이라는 프로토콜을 추가해준다.
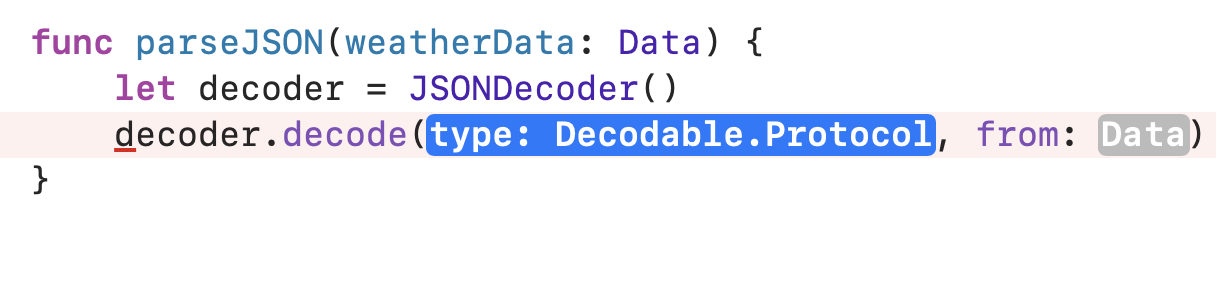
WeatherManager.swift로 돌아와서
아래와 같이 decoder를 만들어준다.
| func parseJSON(weatherData: Data) { let decoder = JSONDecoder() decoder.decode(WeatherData.self, from: weatherData) } |
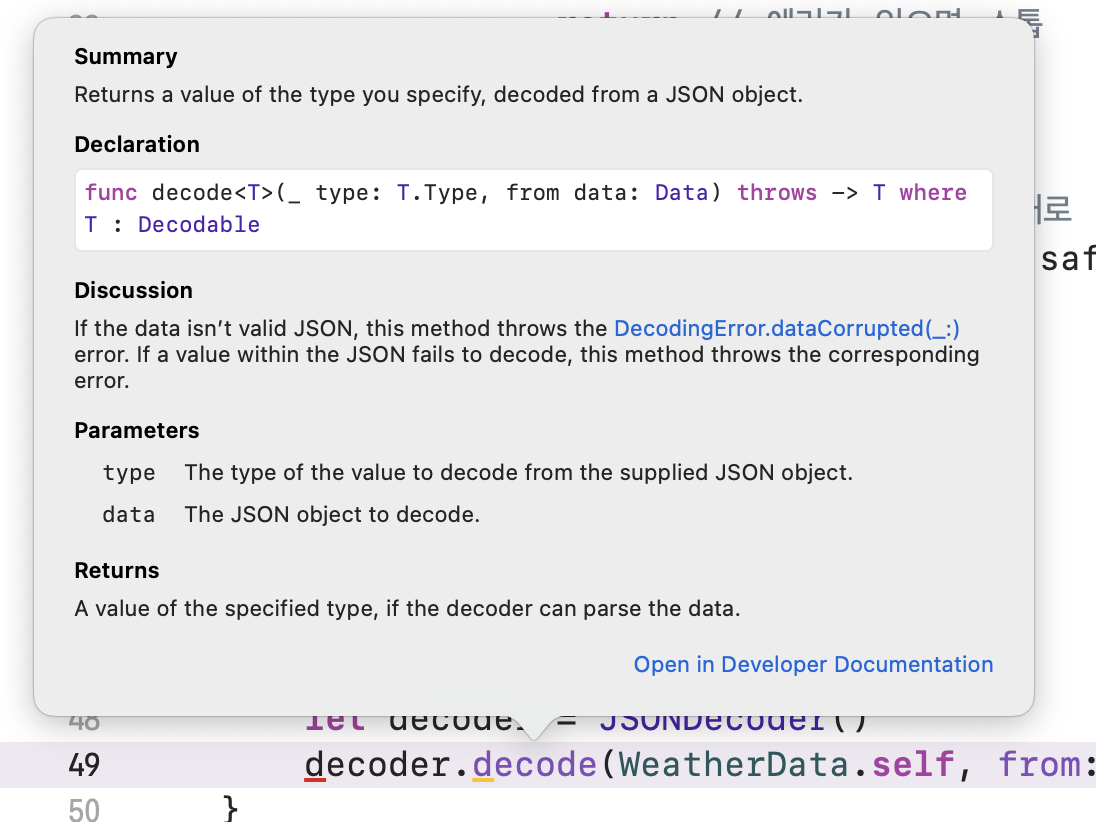
decode를 자세히 살펴보면
'throws' 라는 키워드가 보인다.
이는 디코드 중에 어떤 문제가 발생하면 error를 throw out할 수 있다는 의미다.
따라서 do ~ catch ~ 구문을 사용해줘야 하기 때문에
위 코드가 현재 에러가 난 것이다.
아래처럼 고쳐준다.
| func parseJSON(weatherData: Data) { let decoder = JSONDecoder() do{ let decodedData = try decoder.decode(WeatherData.self, from: weatherData) print(decodedData.name) } catch{ print(error) } } |
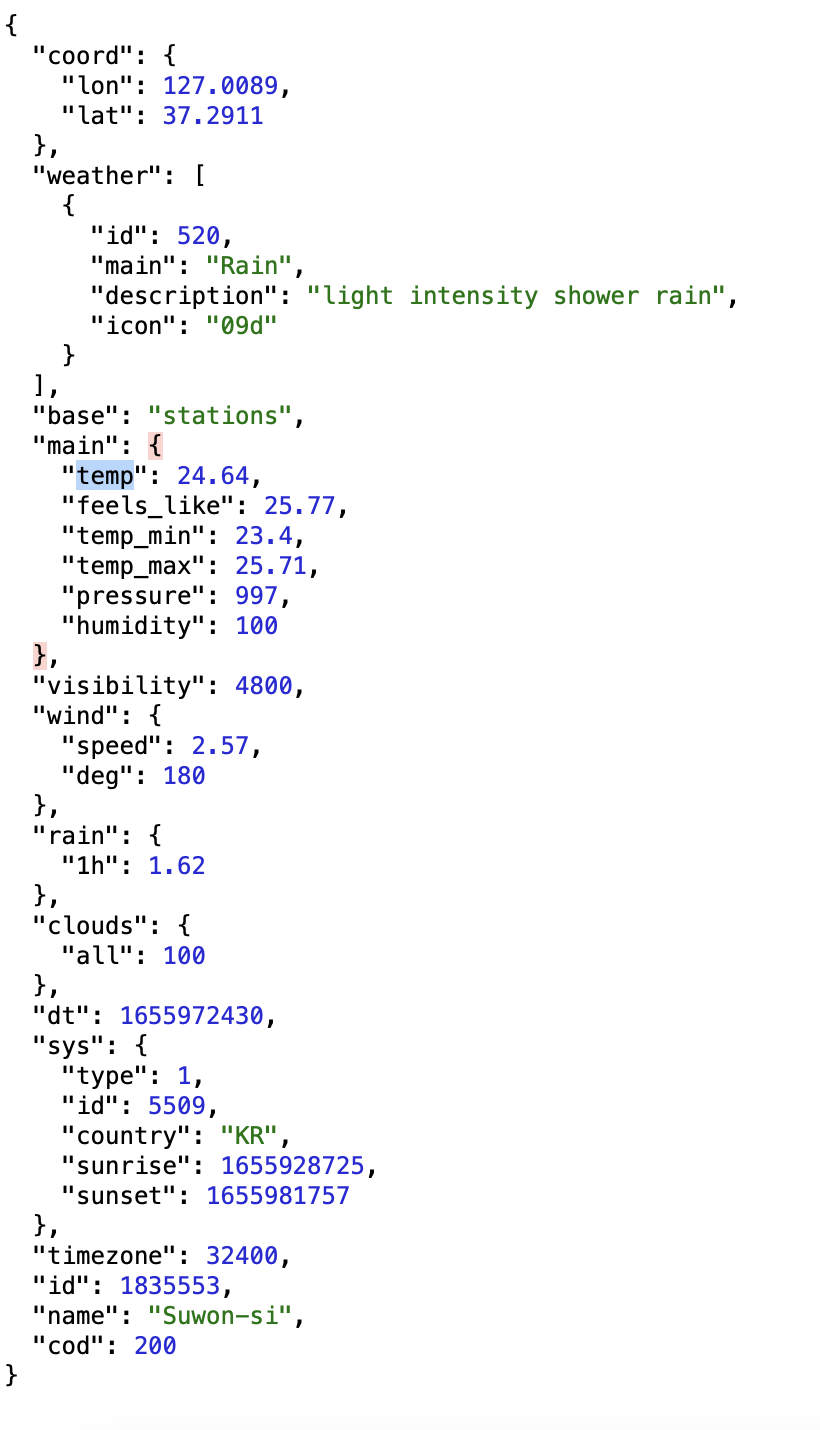
웹 브라우저에서 이렇게 받아볼 수 있다.
temp를 받아오려면 경로를 알아야 한다.
현재 main.temp 이다.
따라서 WeatherData.swift에서 이에 맞게 구조체를 만들어준다.
WeatherData.swift
| import Foundation struct WeatherData: Decodable { let name: String let main: Main } struct Main: Decodable { let temp: Float } |
이때 주의할 점은 json에 있는 요소들의 이름과
구조체의 변수명이 정확하게 일치해야 한다.
WeatherManager.swift
| func parseJSON(weatherData: Data) { let decoder = JSONDecoder() do{ let decodedData = trydecoder.decode(WeatherData.self, from: weatherData) print("decodedData.name: \(decodedData.name)") print("decodedData.main.temp: \(decodedData.main.temp)") } catch{ print(error) } } |
하고 빌드 앤 런하고
Suwon을 입력해본다.
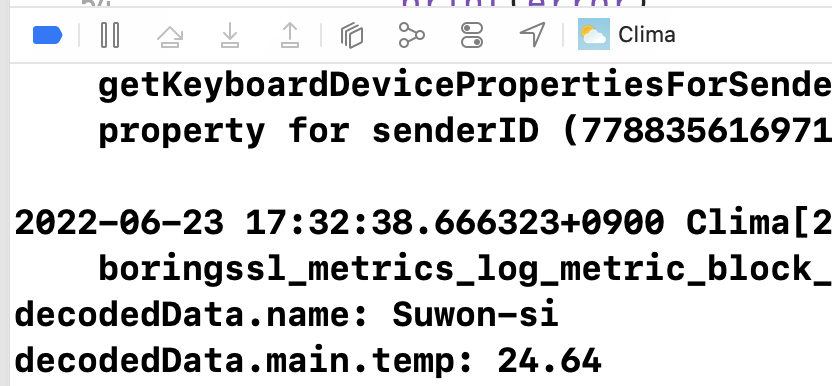
로그가 맞게 찍힌 것을 볼 수 있다.
리스트 형태의 데이터 불러오기
이번엔 description을 찍어보자.
WeatherData.swift
| struct WeatherData: Decodable { let name: String let main: Main let weather: [Weather] } struct Main: Decodable { let temp: Double } struct Weather: Decodable { let description: String } |
WeatherManager.swift
| func parseJSON(weatherData: Data) { let decoder = JSONDecoder() do{ let decodedData = trydecoder.decode(WeatherData.self, from: weatherData) print("decodedData.name: \(decodedData.name)") print("decodedData.main.temp: \(decodedData.main.temp)") print("decodedData.weather[0].description: \(decodedData.weather[0].description)") } catch{ print(error) } } |
결과

참고
안젤라유 강의: https://www.udemy.com/course/ios-13-app-development-bootcamp/
iOS & Swift - The Complete iOS App Development Bootcamp
From Beginner to iOS App Developer with Just One Course! Fully Updated with a Comprehensive Module Dedicated to SwiftUI!
www.udemy.com